
Make This Yoga Tank Top

With all this time I've spent in the yoga studio, I've amassed quite the collection of tights. As far as tanks go, my collection is rather lacking. When I'm out shopping for tops, my noggin shouts "YOU COULD MAKE THAT," and I can't seem to justify the purchase. Alright, brain, you win.
Recently, I took a stack of t-shirts that I love (but never wear) and turned them into the workout gear I knew they could be. I mean really, what's more motivating than a tank emblazoned the GNR logo? (Nothing.) As far as DIY tutorials go, this one is pretty easy, and can be further simplified by eliminating the adjustments on the sewing machine.

Supplies
Stack of t-shirts
Scissors
Pins
Measuring tape
Sewing machine (optional)
Instructions
Start by cutting off the sleeves as close to the shoulder seam as possible. You can always cut out more if necessary. The collar can also be cut out like the tee shown here, but this generally requires that you sew it to adjust it to fit. For some shirts, I left the collar as is.

Try on the shirt and see if you like the fit of the shoulders and collar, and trim until it fits you. Because I cut the collar out, I took the shoulders about an inch with a quick stretch stitch along the seams. If you like the fit, cut off the excess material. If not, rip out the stitches and try again.

The next part is an easy way to make the back a little more interesting.
Fold the shirt in half so that the armholes are in the center. Measure out one inch cuts, and mark them with pins. If I left the collar on, I started the pins three to four inches from the top of the shirt.
Decide how long you want the slits to be in the back. For this tee, I marked out a dot that was five inches from the edge of the shirt, and then decreased each following slice by one quarter of an inch. Make the horizontal cuts, and give the shirt a pull so that the slices roll in on themselves.


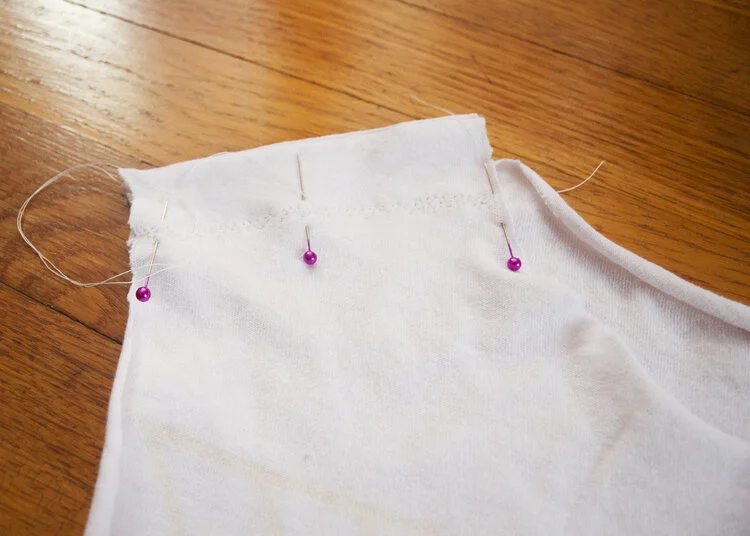
The last sewing adjustment makes the shirt fit a little nicer, but isn't necessary. Put the shirt back on, and estimate about where you want the armholes to start. Take it back off, flip it inside out, and mark out the top of the seam with a pin. Pin out a diagonal line to the hem of the shirt, and sew up with a stretch stick. Cut off the excess fabric. I cut off the bottom hem, but you can leave it on if you like the fit.

DONEZO. Now I can sport my love for the '80s while I'm getting my ohm on. I'm pretty happy with the way these turned out. I'll probably be trying a few different cuts for the back for other tees.

